SHRK Stands — Moza R3
Everything you need to assemble, mount, and dial in your SHRK stand for the Moza R3 direct drive wheel. Follow our step-by-step instructions to get your rig up and running safely — with the correct hardware, torque specs, and positional settings covered from unboxing to first session.
4
Assembly Stages
~30 min
Average Setup Time
Moza R3
Optimized Compatibility
SHRK Stands are engineered specifically for the Moza R3 direct drive racing wheel ecosystem. Review the supported hardware configurations, system requirements, and stand model compatibility matrix below before beginning installation.
All SHRK stand models are designed and load-tested to accommodate the Moza R3 direct drive base and its full accessory ecosystem.
The standard Moza R3 5.5 Nm direct drive wheel base. All SHRK stand models fully support this unit's mounting bolt pattern and dimensional footprint.
Compatible with all official Moza R3 compatible steering wheel faces, including the ES, CM, and CS series wheels connected via the R3 quick-release hub.
SHRK stands include integrated cable management channels sized for the Moza R3's USB-C data and power cable bundle, keeping your rig tidy and free of snag points.
Ensure your existing sim rig and workspace meet the following requirements before installing a SHRK stand. These specifications apply across all standard SHRK stand models.
| Requirement | Specification | Notes |
|---|---|---|
| Desk or surface depth | Minimum 500 mm | Required for stable base clamp or bolt-down |
| Surface thickness (clamp mount) | 15 mm – 80 mm | SHRK clamp jaw accommodates this range |
| Clearance below surface | Minimum 60 mm | Required for clamp body and hardware access |
| USB port availability | 1× USB-A or USB-C (5V 3A) | For Moza R3 base data and power connection |
| Floor space (standalone models) | Minimum 400 mm × 400 mm footprint | Applies to SHRK S2 and S3 floor-standing models |
| Maximum load capacity | Up to 5 kg total | Base + wheel + accessories combined |
Use the matrix below to identify which SHRK stand model best matches your setup. All models are confirmed compatible with the Moza R3 base unit.
| SHRK Model | Mount Type | Moza R3 Base | Height Adjust | Cable Mgmt | Custom Build |
|---|---|---|---|---|---|
| SHRK S1 | Desk Clamp | ✓ Confirmed | Fixed | Basic | No |
| SHRK S2 | Desk Clamp | ✓ Confirmed | 3-position | Full channel | No |
| SHRK S3 | Floor Standing | ✓ Confirmed | Infinite (tool-free) | Full channel | No |
| SHRK Custom | Customer-specified | ✓ Confirmed | Customer-specified | Full channel | ✓ Yes |
Not sure which model fits your setup? Contact our team at aerolddizon123@gmail.com for a compatibility recommendation before ordering.
Follow these steps carefully to assemble your SHRK Stand and mount your Moza R3 wheel. Each phase is designed to ensure a stable, secure, and correctly aligned setup from the ground up.
Remove all components from the shipping box and lay them flat on a clean, stable surface. Locate the included parts manifest and verify that every listed component is present — uprights, base plate, crossbar, mounting bracket, hardware bag, and any optional accessories included in your order. If any item is missing or damaged, contact SHRK Stands support before proceeding.
Position the base plate on the floor in your intended setup location. Attach the two front footer stabilizers using the M8 bolts and included flat washers — hand-tighten only at this stage. Next, connect the rear crossbar to the base plate using the M8 hex bolts. Do not fully torque any joint until the entire frame skeleton is loosely assembled, allowing for positional adjustments.
Slide the main vertical upright column into the base plate receiver socket. Align the pre-drilled holes on the column with the corresponding holes on the base receiver. Insert the M10 locking bolt through the side clamp and thread it finger-tight. Stand the column upright and use a spirit level to confirm vertical alignment on both axes before proceeding to tighten.
Attach the dedicated Moza R3 wheel mounting bracket to the top section of the upright column. The bracket features pre-drilled slots that align with the SHRK upright rail pattern. Slide the bracket to your preferred height position, then insert the four M8 flange bolts through the bracket and tighten evenly in a cross pattern. Place your Moza R3 unit onto the bracket and secure it using the wheel base's native mounting bolts into the bracket's threaded inserts.
Route the Moza R3 power and USB cables along the rear channel of the upright column. Use the included cable clips — spaced approximately every 200mm — to secure the cables neatly against the column. Ensure no cable crosses a pivot point or sharp edge. Leave sufficient slack at the wheel base connection to avoid tension during steering input. Excess cable length should be bundled and clipped at the base of the stand.
With all components in place, perform a full torque pass on every fastener using the provided Allen keys and a calibrated torque wrench where applicable. Start from the base and work upward — base plate bolts, upright column clamp, bracket flange bolts, and finally the wheel base mounting bolts. Sit in your racing position and verify wheel height and angle match your ergonomic preference. Adjust bracket height as needed, then re-torque. Gently apply lateral and forward pressure to the wheel to confirm zero flex before powering on the Moza R3.
Your SHRK Stand is now fully assembled and ready for use with your Moza R3 direct drive wheel. Power on the wheel base and run through Moza's initial calibration sequence. We recommend re-checking all fastener torques after your first 2–3 sessions as components settle under load. If you encounter any issues during installation, refer to the FAQ section below or contact our support team directly.
Everything you need to complete your SHRK Stands installation. Review the required tools, included hardware, and optional accessories before you begin assembly to ensure a smooth setup experience.
These tools are not included with your stand and must be sourced separately prior to installation.
Hex Allen Key Set (Metric)
Sizes 4mm, 5mm, and 6mm required for all primary fasteners.
Torque Wrench
Recommended range: 5–25 Nm for proper mount bolt tightening without overtorque.
Flathead & Phillips Screwdrivers
Medium-size heads for cable routing clips and accessory bracket adjustment.
Measuring Tape or Ruler
For verifying stand width, height, and wheel position during final adjustment.
Spirit Level
Ensures the stand base sits perfectly level on your floor surface.
All of the following components are included in every SHRK Stands shipment. Verify these items upon unboxing.
Main Stand Frame Assembly
Pre-welded steel frame with protective coating. Qty: 1 unit.
Moza R3 Wheel Mount Plate
Pre-drilled and tapped to Moza R3 bolt pattern spec. Qty: 1 unit.
M6 Socket Cap Bolts (Grade 8.8)
Primary structural fasteners. Qty: 12 bolts with flat and split washers.
Adjustable Height Collar Clamps
Allows column height adjustment from 80cm to 110cm. Qty: 2 pairs.
Anti-Slip Rubber Feet
Floor protection and vibration dampening pads. Qty: 4 feet.
Assembly Instruction Sheet
Printed quick-reference guide with torque specifications and step diagrams.
Enhance your SHRK stand setup with these compatible add-ons. Sold separately — contact us to add to your order.
Cable Management Kit
Includes velcro ties, J-channel clips, and adhesive routing brackets for a clean build.
Side Tray Attachment
Bolt-on accessory tray for shifter, handbrake, or drinks holder — left or right mount.
Extended Base Stabilizer Feet
Wide-stance base extenders for use on carpet or uneven surfaces where extra stability is needed.
Monitor Arm Bracket
Rear-mount bracket compatible with VESA 75x75 and 100x100 monitor arms up to 27 inches.
Replacement Hardware Pack
Full spare fastener set — includes all bolts, washers, and clamp hardware from the original kit.
Before beginning assembly, confirm all of the following to avoid delays or damage during installation.
Common questions about installing and configuring your SHRK Stand with the Moza R3 direct drive wheel. If your question isn't answered here, reach out to our support team directly.
All current SHRK Stand models are engineered specifically for the Moza R3 direct drive wheelbase. The mounting plate matches the Moza R3's bolt pattern exactly — 70mm x 50mm — and supports both standard and quick-release adapter configurations. If you are using a non-standard adapter or third-party hub, verify clearance dimensions before ordering. Contact us for confirmation if you're unsure.
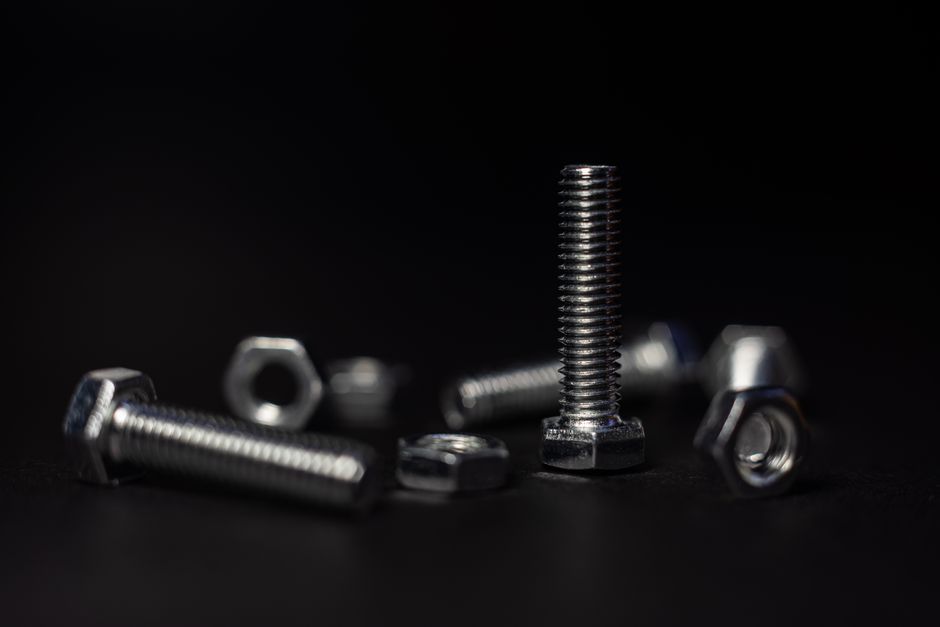
For the wheelbase mounting bolts (M6), apply 8–10 Nm of torque using a calibrated torque wrench. For the stand frame assembly bolts (M8), tighten to 18–22 Nm. Do not exceed these values — overtightening can strip threads or warp the mounting surface, affecting wheel alignment and feedback accuracy. Re-check torque after the first two hours of use, as bolts may settle slightly under load.
Minor rocking is almost always caused by one of three things: uneven floor surface, under-tightened base feet, or a loose crossbrace connection. Start by adjusting all four leveling feet until the stand sits flat with zero wobble. Then confirm the crossbrace bolts are torqued to spec. If rocking persists on a hard surface, the optional anti-slip floor mat (sold separately) eliminates lateral movement effectively. On carpet, extend the feet slightly to ensure contact through the pile.
For most seated positions, set the wheel center at approximately the same height as your sternum when seated in your racing seat or chair — typically 90–100 cm from the floor for average adult height. Tilt the wheel face between 10° and 20° toward you for a natural wrist angle. The SHRK Stand vertical column supports full height adjustment in 25 mm increments, and the tilt bracket locks at 0°, 10°, 15°, and 20°. Experiment within these ranges using short test sessions before locking your final position.
Yes. All SHRK Stand column profiles include a 22 mm internal cable channel running the full height of the upright. Feed your Moza R3 USB and power cables through the top entry port, route them down through the column, and exit at the cable exit port near the base. Use the included nylon cable clips to secure the harness at the entry and exit points. This keeps your rig clean and prevents cable snagging during high-torque feedback moments.
Full assembly from unboxing to first use takes approximately 25–40 minutes for most users. You will need a 4 mm Allen key (hex wrench), a 5 mm Allen key, and a 13 mm open-end or adjustable wrench. A torque wrench is strongly recommended for the wheelbase mount bolts but not strictly required. All fasteners and hardware are included in the box. No drilling, cutting, or power tools are required for standard assembly.
First, confirm the stand model you received matches the Moza R3 SKU listed on your order. Then check that the mounting plate has not been installed in the wrong orientation — the plate is directional; the Moza logo cutout faces upward when correctly oriented. If holes still don't align after re-orienting, do not force the bolts. Contact SHRK Stands support at aerolddizon123@gmail.com with a photo of the misalignment and your order number. We will diagnose and resolve the issue promptly.
Standard SHRK Stand models are wheel-stand units designed exclusively for the Moza R3 wheelbase. They do not include a built-in pedal plate. However, our custom build program supports integrated pedal plate configurations. If you need a combined wheel and pedal stand solution, submit a custom build request through the Contact page. Our custom builds can accommodate most standard flat-mount and angled-mount pedal sets alongside the Moza R3 wheelbase.
If you ran into an issue during installation or have questions specific to your rig setup, our support team is ready to assist. Reach out via the contact form or email us directly — we respond to every inquiry and are available 24/7.
You can also email us directly at aerolddizon123@gmail.com and we'll get back to you as quickly as possible with a detailed answer or step-by-step guidance tailored to your SHRK stand model.
Send us a detailed message and we'll respond with a tailored solution for your Moza R3 stand installation.
Use our structured contact form to describe your issue in detail — including your stand model and Moza R3 configuration — for a faster, more accurate response.
Looking for an upgrade or a different configuration? Explore our full lineup of standard and custom SHRK Stands built for Moza R3 compatibility.
Build your comfort. Custom sim racing rig stands engineered for the Moza R3 direct drive wheel.
© 2025 SHRK Stands. All rights reserved.